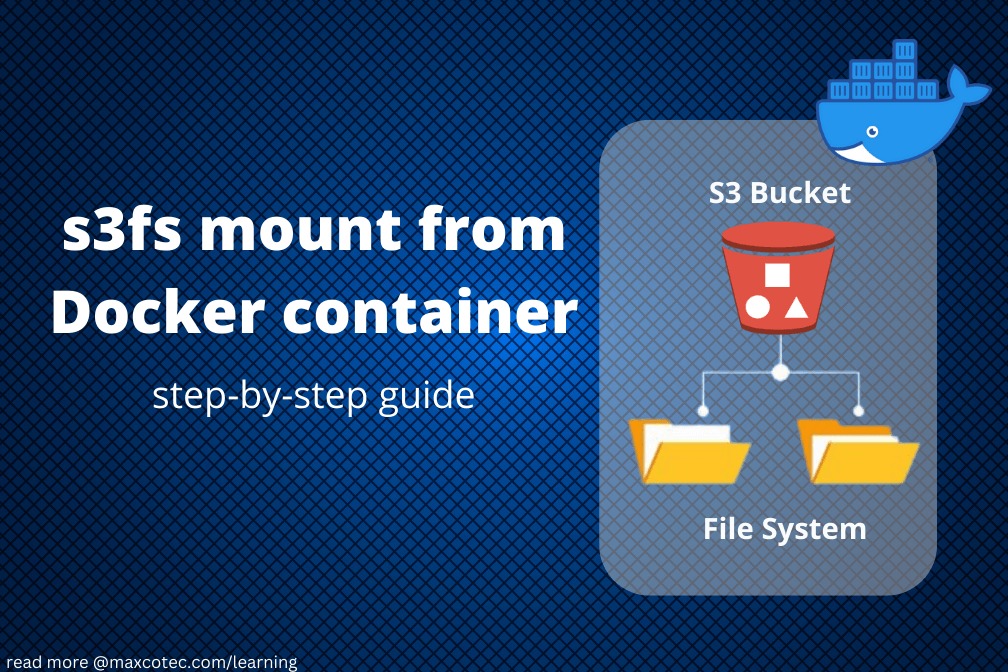
In this article, you’ll learn how to install s3fs to access s3 bucket from within a docker container.
Watch video tutorial on YouTube.
What you will learn
- How to create s3 bucket in your AWS account
- How to create IAM user with policy to read & write from s3 bucket
- How to mount s3 bucket as file system inside your Docker Container using s3fs.
- Best practices to secure IAM user credentials
- Troubleshooting possible s3fs mount issues
By the end of this tutorial, you’ll have a single Dockerfile that will be capable of mounting s3 bucket. You can then use this Dockerfile to create your own cusom container by adding your busines logic code.
Code
Full code available at https://github.com/maxcotec/s3fs-mount
Prerequisites
- Basic knowledge of Docker (or Podman) is required to help you understand how we’ll build conaitner specs using Dockerfile.
- An AWS account (free tier will do!)
What on earth is fuse & s3fs ?
There isn’t a straightforward way to mount a drive as file system in your operating system. Unles you are the hard-core developer and have courage to amend operating system’s kernel code. But with FUSE (Filesystem in USErspace), you really don’t have to worry about such stuff. Its a software interface for Unix-like computer operating system, that lets you easily create your own file systems even if you are not the root user, without needing to amend anything inside kernel code.
s3fs (s3 file system) is build on top of FUSE that lets you mount s3 bucket. So basically, you can actually have all of the s3 content in the form of a file directory inside your Linux, macOS and FreeBSD operating system. That’s going to let you use s3 content as file system e.g. using commands like ls, cd, mkdir, etc.
Create S3 bucket
An s3 bucket can be created by two major ways.
Using s3 console
- Sign in to the AWS Management Console and open the Amazon S3 console at https://console.aws.amazon.com/s3/
- Choose Create bucket. The Create bucket wizard opens.
- In Bucket name, enter a DNS-compliant name for your bucket.The bucket name must:
- Be unique across all of Amazon S3.
- Be between 3 and 63 characters long.
- Not contain uppercase characters.
- Start with a lowercase letter or number.After you create the bucket, you cannot change its name.
Using AWS CLI
If you have aws cli installed, you can simply run following command from terminal. Don’t forget to replace <your-bucket-name>.
aws s3api create-bucket \ --bucket <your-bucket-name> \ --region eu-west-1
Create IAM user
An AWS Identity and Access Management (IAM) user is used to access AWS services remotly. This IAM user has a pair of keys used as secret credentials access key ID and a secret access key. this key can be used by an application or by any user to access AWS services mentioned in the IAM user policy. Let us go ahead and create an IAM user and attach an inline policy to allow this user a read and write from/to s3 bucket.
- From Amazon Management console, select
IAMby typing IAM on search bar located at top - From IAM console, select
Usersfrom left panel under Access Management - click
Add users, type in the name of this user ass3fs_mount_user - select `Access key – Programmatic access` as AWS access type. click
Next - On permissions tab, select
Attach existing policies directly, clickcreate policy - Select
JSON editorand paste following policy
{
   "Version":"2012-10-17",
   "Statement":[
      {
         "Action":[
            "s3:ListBucket"
         ],
         "Effect":"Allow",
         "Resource":"arn:aws:s3:::<your-bucket-name>"
      },
      {
         "Action":[
            "s3:DeleteObject",
            "s3:GetObject",
            "s3:PutObject",
            "s3:PutObjectAcl"
         ],
         "Effect":"Allow",
         "Resource":"arn:aws:s3:::<your-bucket-name>/*"
      }
   ]
}
7. Click next: Review and name policy as s3_read_wrtite, click Create policy
8. go back to Add Users tab and select the newly created policy by refreshing the policies list.
9. Click next: tags -> Next: Review and finally click Create user
10. You’ll now get the secret credentials key pair for this IAM user. Download the CSV and keep it safe.

The Dockerfile
At this point, you should be all set to Install s3fs to access s3 bucket as file system. Let us now define a Dockerfile for container specs.
Setup up environments
FROM python:3.8-slim as envs
LABEL maintainer="Maxcotec <maxcotec.com/learning>"

# Set arguments to be used throughout the image
ARG OPERATOR_HOME="/home/op"
# Bitbucket-pipelines uses docker v18, which doesn't allow variables in COPY with --chown, so it has been statically set where needed.
# If the user is changed here, it also needs to be changed where COPY with --chown appears
ARG OPERATOR_USER="op"
ARG OPERATOR_UID="50000"

# Attach Labels to the image to help identify the image in the future
LABEL com.maxcotec.docker=true
LABEL com.maxcotec.docker.distro="debian"
LABEL com.maxcotec.docker.module="s3fs-test"
LABEL com.maxcotec.docker.component="maxcotec-s3fs-test"
LABEL com.maxcotec.docker.uid="${OPERATOR_UID}"

# Set arguments for access s3 bucket to mount using s3fs
ARG BUCKET_NAME
ARG S3_ENDPOINT="https://s3.eu-west-1.amazonaws.com"

# Add environment variables based on arguments

ENV OPERATOR_HOME ${OPERATOR_HOME} ENV OPERATOR_USER ${OPERATOR_USER} ENV OPERATOR_UID ${OPERATOR_UID} ENV BUCKET_NAME ${BUCKET_NAME} ENV S3_ENDPOINT ${S3_ENDPOINT}
  # Add user for code to be run as (we don't want to be using root)
RUN useradd -ms /bin/bash -d ${OPERATOR_HOME} --uid ${OPERATOR_UID} ${OPERATOR_USER}
The above code is the first layer of our Dockerfile, where we mainly set environment variables and defining container user. explained as follows;
- Start by inheriting from base image
python:3.8-slimwhich is a Debian based OS. - Keeping containers open access as root access is not recomended. Always create a container user. In this case, we define it as
opwith path/home/opand uid50000. - Setting up some labels (optional)
- We’ll take bucket name `BUCKET_NAME` and S3_ENDPOINT` (default: https://s3.eu-west-1.amazonaws.com) as arguments while building image
--build-arg. - Finally creating the operator user.
Install and configure s3fs
FROM envs as dist

# install s3fs
RUN set -ex && \
    apt-get update && \
    apt install s3fs -y

# setup s3fs configs
RUN echo "s3fs#${BUCKET_NAME} ${OPERATOR_HOME}/s3_bucket fuse _netdev,allow_other,nonempty,umask=000,uid=${OPERATOR_UID},gid=${OPERATOR_UID},passwd_file=${OPERATOR_HOME}/.s3fs-creds,use_cache=/tmp,url=${S3_ENDPOINT} 0 0" >> /etc/fstab

RUN sed -i '/user_allow_other/s/^#//g' /etc/fuse.conf
- We start from the second layer, by inheriting from the first
FROM envs as dist. - Install s3fs
apt install s3fs -y. If you wish to choose different base image which is a different OS, please make sure to install s3fs for that specific OS. To install s3fs for desired OS, follow the official installation guide. - Next we need to add one single line in /etc/fstab to enable s3fs mount work;
"s3fs#${BUCKET_NAME} ${OPERATOR_HOME}/s3_bucket fuse _netdev,allow_other,nonempty,umask=000,uid=${OPERATOR_UID},gid=${OPERATOR_UID},passwd_file=${OPERATOR_HOME}/.s3fs-creds,use_cache=/tmp,url=${S3_ENDPOINT} 0 0"
- Our mount location is
${OPERATOR_HOME}/s3_bucket - addition configs for s3fs to allow non-root user to allow read/write on this mount location `allow_others,umask=000,uid=${OPERATOR_UID}`
- we ask s3fs to look for secret credentials on file .s3fs-creds by `passwd_file=${OPERATOR_HOME}/.s3fs-creds`
4. And the final bit left is to un-comment a line on fuse configs to allow non-root users to access mounted directories
sed -i '/user_allow_other/s/^#//g' /etc/fuse.conf
Switch to operator user
# Set our user to the operator user
USER ${OPERATOR_USER}
WORKDIR ${OPERATOR_HOME}
COPY main.py .
Change user to operator user and set the default working directory as ${OPERATOR_HOME} which is /home/op. Here is your chance to import all your business logic code from host machine into the docker container image. In our case, we just have a single python file main.py.
Run-time configs
RUN printf '#!/usr/bin/env bash  \n\
mkdir ${OPERATOR_HOME}/s3_bucket \n\
echo ${ACCESS_KEY_ID}:${SECRET_ACCESS_KEY} > ${OPERATOR_HOME}/.s3fs-creds \n\
chmod 400 ${OPERATOR_HOME}/.s3fs-creds \n\
mount -a \n\
exec python ${OPERATOR_HOME}/main.py \
' >> ${OPERATOR_HOME}/entrypoint.sh
After setting up the s3fs configurations, its time to actually mount s3 bucket as file system in given mount location. We are going to do this at run time e.g. after building the image with docker runcommand. A bunch of commands needs to run at the container startup, which we packed inside an inline entrypoint.sh file, explained follows;
- firstly, we create .s3fs-creds file which will be used by s3fs to access s3 bucket. The content of this file is as simple as
<access_key_id>:<secret_access_key> - give read permissions to the credential file
chmod 400 - create the directory where we ask s3fs to mount s3 bucket to
- finally mount the s3 bucket
mount -a. If this line runs without any error, that means s3fs has successfully mounted your s3 bucket - next, feel free to play around and test the mounted path. In our case, we run a python script to test if mount was successful and list directories inside s3 bucket.
- give executable permission to this entrypoint.sh file
- set ENTRYPOINT pointing towards the entrypoint bash script
Time to see s3fs in action!
Build the image;
docker build . -t s3fs_mount --build-arg BUCKET_NAME=<your-bucket-name>
Output;
. . .
> [2/2] COMMIT s3fs_mount
> --> 575382adfa1
> Successfully tagged localhost/s3fs_mount:latest
run the image with privileged access. Here pass in your IAM user key pair as environment variables <access_key_id> and <secret_access_key>
docker run -it -e ACCESS_KEY_ID=<access_key_id> -e SECRET_ACCESS_KEY=<secret_access_key> --privileged localhost/s3fs_mount:latest
Output:
s3fs-mount % podman run --privileged -e ACCESS_KEY_ID=AKIA5RUBBISHUWBOY -e SECRET_ACCESS_KEY=OuvzUjigtHisIsNotWhaTyOuThINkL+EsNs8U7B localhost/s3fs_mount:latest Checking mount status bucket mounted successfully :) list s3 directories ['foo']
If everything works fine, you should see an output similar to above. This lines are generated from our python script, where we are checking if mount is successful and then listing objects from s3.
import os

if __name__ == "__main__":
    print('Checking mount status')
    if os.path.ismount(f"s3_bucket/"):
        print(f"bucket mounted successfully :)")
    else:
        print(f"bucket not mounted :(")
    print("list s3 directories")
    print(os.listdir(f"s3_bucket/"))
You can also go ahead and try creating files and directories from within your container and this should reflect in s3 bucket. Do this by overwriting the entrypoint;
anum_sheraz@YHGFX6RHVJ s3fs-mount % podman run -it --privileged -e ACCESS_KEY_ID=AKIA5RUBBISHUWBOY -e SECRET_ACCESS_KEY=tHisIsNotWhaTyOuThINkL+EsNdreZNfZOs8U7B --entrypoint /bin/bash localhost/s3fs_mount:latest op@ca238738054f:~$ mkdir ${OPERATOR_HOME}/s3_bucket op@ca238738054f:~$ echo ${ACCESS_KEY_ID}:${SECRET_ACCESS_KEY} > ${OPERATOR_HOME}/.s3fs-creds op@ca238738054f:~$ chmod 400 ${OPERATOR_HOME}/.s3fs-creds op@ca238738054f:~$ mount -a op@ca238738054f:~$ ls s3_bucket/ foo op@ca238738054f:~$ touch s3_bucket/my-new-file op@ca238738054f:~$ ls s3_bucket/ foo my-new-file
Now head over to the s3 console. After refreshing the page, you should see the new file in s3 bucket.

Troubleshooting
Things never work on first try. So here are list of problems/issues (with some possible resolutions), that you could face while installing s3fs to access s3 bucket on docker container;
1. Transport endpoint is not connected: ‘s3_bucket/’
This error message is not at all descriptive and hence its hard to tell whats exactly is causing this issue. There can be multiple causes for this. Try following;
- Make sure you are using the correct credentails key pair.
- Make sure your s3 bucket name is correctly following aws standards.
- Sometimes s3fs fails to establish connection at first try, and fails silently while typing
mount -a. Try increasing the retries on s3fs command by adding following option `-o retries=10` in in /etf/fstab file. - Sometimes the mounted directory is being left mounted due to a crash of your filesystem. In that case, try force unounting the path and mounting again.
fuzermount -uf /home/op/s3_bucket
mount /home/op/s3_bucket
2. Can’t access encrypted s3 bucket
If your bucket is encrypted, use sefs option `-o use_sse` in s3fs command inside /etc/fstab file. Possible values are SSE-S3, SSE-C or SSE-KMS. s33 more details about these options in s3fs manual docs.
3. s3fs: command not found
This is obviously because you didn’t managed to Install s3fs and accessing s3 bucket will fail in that case. Check and verify the step `apt install s3fs -y` ran successfully without any error. This could also be because of the fact, you may have changed base image that’s using different operating system. Current Dockerfile uses python:3.8-slim as base image, which is Debian. if the base image you choose has different OS, then make sure to change the installation procedure in Dockerfile apt install s3fs -y. To install s3fs for desired OS, follow the official installation guide.
Securing credentials
Do you know s3fs can also use iam_role to access s3 bucket instead of secret key pairs. Simple provide option `-o iam_role=<iam_role_name>` in s3fs command inside /etf/fstab file. Note that this is only possible if you are running from a machine inside AWS (e.g. EC2). But AWS has recently announced new type of IAM role that can be accessed from anywhere. This is outside the scope of this tutorial, but feel free to read this aws article
https://aws.amazon.com/blogs/security/extend-aws-iam-roles-to-workloads-outside-of-aws-with-iam-roles-anywhere
Code
Full code available at https://github.com/maxcotec/s3fs-mount


