Snowflake to kafka – Introduction
In this article, we will explore how to leverage the capabilities of Snowflake and Kafka to send table deltas from Snowflake to a Kafka topic using Snowflake streams and the S3 source Kafka connector. We will take a step-by-step approach to guide you through the entire process, from setting up a Kafka cluster to creating a Snowflake integration with S3, creating sample tables, and attaching streams objects. You will also learn how to insert data into the table and see table deltas in streams, and how to send table content into S3 using the COPY INTO command. Finally, we will perform an end-to-end test to ensure that our integration works correctly.
If you are a data engineer, data analyst, or anyone interested in leveraging the power of Snowflake and Kafka for your data processing needs, this article is for you. We hope that by the end of this article, you will have a solid understanding of how to use Snowflake and Kafka together and how to leverage the S3 source Kafka connector to send table deltas to a Kafka topic.
Watch tutorial on YouTube
Source code available here: https://github.com/maxcotec/snowflake-to-kafka
Snowflake
Snowflake is an advanced cloud-based data warehousing platform that offers a high-performance, adaptable, and scalable solution for data storage and analysis. It distinguishes itself with its innovative architecture that decouples computing and storage, empowering users to independently scale their computing resources without affecting their data storage requirements. Snowflake offers an array of advanced security features and seamlessly integrates with diverse data integration and transformation tools, making it the preferred solution for organizations seeking to modernize their data infrastructure and enhance their data analytics capabilities. Its user-friendly interface and scalability contribute to its growing popularity among businesses across various sectors and sizes.
Kafka
Kafka is a powerful distributed streaming platform renowned for its scalability and fault-tolerant capabilities. It facilitates real-time data streaming and processing, making it a vital component in modern data pipelines, real-time analytics, and applications that rely on up-to-date data updates. With its publish-subscribe model, Kafka empowers users to efficiently store and subscribe to data topics, enabling a wide range of use cases across organizations. It serves as a valuable solution for log aggregation, real-time monitoring, machine learning, and various other data-intensive scenarios.
Kafka connectors
These are powerful set of tools and libraries that facilitate seamless integration of Kafka with other data systems, such as databases, data lakes, and message queues. Some popular Kafka connectors include the JDBC connector, which allows data to be ingested from any database that supports JDBC, the HDFS connector, which allows Kafka data to be exported and transformed into Hadoop’s distributed file system, and the Elasticsearch connector, which enables real-time data indexing and search.
In this article, we will focus on the S3 source Kafka connector. This connector enables Kafka to stream data directly by reading files landing into Amazon S3, making it ideal for use cases such as data ingestion, batch processing, and data archiving.
Kafka setup
To set up Kafka, we will be using a Docker image called fast-data-dev from the popular Lenses.io project. This Docker image provides a complete Kafka development environment, including Kafka brokers, Zookeeper, a Kafka Connect worker, and a web-based user interface. By using this Docker image, we can quickly and easily set up a Kafka cluster for testing and development purposes. To simplify the process even further, created a docker-compose.yaml file that can be used to spin up the Kafka cluster;
version: "3"

services:
    snowflake-to-kafka-cluster:
        container_name: snowflake-stream-kafka
        image: landoop/fast-data-dev
        environment:
          ADV_HOST: 127.0.0.1
          RUNTESTS: 0
        ports:
          - 2181:2181
          - 3030:3030 # web-ui
          - 8082-8083:8082-8083
          - 9581-9585:9581-9585
          - 9092:9092
Spin up the docker service by running following command;
docker-compose up
after few moments, this docker image will build a full-fledged kafka cluster for you, with following logs;
...
snowflake-stream-kafka  | 2023-05-02 01:20:25,637 INFO exited: broker (exit status 1; not expected)
snowflake-stream-kafka  | 2023-05-02 01:20:25,641 INFO spawned: 'broker' with pid 1928
snowflake-stream-kafka  | 2023-05-02 01:20:26,641 INFO success: broker entered RUNNING state, process has stayed up for > than 1 seconds (startsecs)
snowflake-stream-kafka  | 2023-05-02 01:20:29,657 INFO exited: broker (exit status 1; not expected)
snowflake-stream-kafka  | 2023-05-02 01:20:29,659 INFO spawned: 'broker' with pid 2357
snowflake-stream-kafka  | 2023-05-02 01:20:30,667 INFO success: broker entered RUNNING state, process has stayed up for > than 1 seconds (startsecs)
...
If everything looks good so far, go over your your browser and type 127.0.0.1:3030. You will be welcomed with a nice looking user-interface like below;

Kafka Connector Setup
Lenses provides number of kafka connectors that comes build-in to this docker image. To integration s3 source kafka connector, follow below steps;
- Click
EnterunderCONNECTORSsection. - From Connectors page, click
NEWand search for s3SourceConnector. An s3 source connector by Landoop will show up (io.lenses.streamreactor.connect.aws.s3.source.S3SourceConnector). This is the only one available at the time of writing. - Under connector properties, type in the following;
name=S3SourceKafkaConnector # this can be anything
connector.class=io.lenses.streamreactor.connect.aws.s3.source.S3SourceConnector
value.converter=org.apache.kafka.connect.storage.StringConverter
topics=s3-kafka-etl
tasks.max=1
connect.s3.kcql=insert into s3-kafka-etl select * from maxcotec-dev:users STOREAS `json`
connect.s3.aws.auth.mode=Credentials
connect.s3.aws.access.key=$AWS_IAM_USER_ACCESS_KEY
connect.s3.aws.secret.key=$AWS_IAM_USER_SECRET_KEY
connect.s3.aws.region=$AWS_REGION
* Replace the bucket
maxcotec-devwith your own bucket name.
* Replace$AWS_REGIONto the region where you s3 bucket is located
* Replace the $AWS_IAM_USER_ACCESS_KEY and $AWS_IAM_USER_SECRET_KEY with your actual AWS IAM user secret credentials. Make sure this user has following IAM policy;{ "Version": "2012-10-17", "Statement": [ { "Sid": "ListObjectsInBucket", "Effect": "Allow", "Action": ["s3:ListBucket"], "Resource": ["arn:aws:s3:::maxcotec-dev"] }, { "Sid": "AllObjectActions", "Effect": "Allow", "Action": "s3:*Object", "Resource": ["arn:aws:s3:::maxcotec-dev/*"] } ] }The above configuration lines are pretty much self explanatory, except following
* topics: comma separated names of kafka topics
* connect.s3.kcql: The above sql like query is supported by Kafka connector to read files in AVRO, Parquet, CSV, text, json, or binary/byte information from an S3 bucket. You can specify multiple KCQL statements separated by ; to have a the connector sink multiple topics.
Read full connector configurations here. - Finally click
Create. If everything works fine, you’ll see green colour indicating all is well
 NOTE: You will also see kafka connector error logs on the same screen if something goes wrong.
Snowflake Storage Integration
In order to offload table deltas into s3 bucket, we have to give grant snowflake necessary permissions to connect with our s3 bucket. Snowflake usually referees this as Storage Integrations. A step-by-step guide to do this is clearly mentioned on their official docs Configure a Snowflake Storage Integration. If you still don’t want to follow along alone, watch this step in our YouTube video. Once you’ve setup this, follow the next steps.
CREATE STORAGE INTEGRATION AWS_SNOWFLAKE_INTEGRATION
  TYPE = EXTERNAL_STAGE
  STORAGE_PROVIDER = 'S3'
  ENABLED = TRUE
  STORAGE_AWS_ROLE_ARN = '${AWS_IAM_ROLE_ARN}'
  STORAGE_ALLOWED_LOCATIONS = ('s3://maxcotec-dev/users/');

CREATE STAGE S3_STORAGE_STAGE
  STORAGE_INTEGRATION = AWS_SNOWFLAKE_INTEGRATION
  URL = 's3://maxcotec-dev/users/'
  FILE_FORMAT = (TYPE = JSON COMPRESSION = NONE);
- ${AWS_IAM_ROLE_ARN}: change this to IAM role that you created following above guide.
- s3://maxcotec-dev/users/: is the name of the table.
NOTE: we set COMPRESSION = NONE because s3 source kafka connector does not picks up any file with name ending with .gzip or .parquet etc. The file name has to end with whatever file format we are mentioning. In this case.json
We have given snowflake permissions to write into our s3 bucket. We have kafka s3 source connector in place, thats waiting for files to be landed in s3 bucket. The next part will be fun!
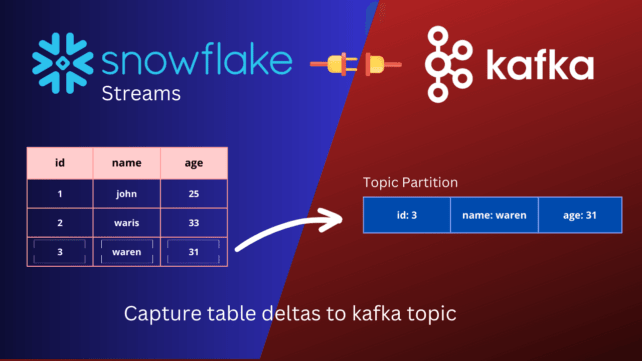
Snowflake Streams
Snowflake streams is a feature that enables change data capture (CDC) on a table. Streams capture changes to the data in the table as they occur, including inserts, updates, and deletes, and store them in a separate object in Snowflake. By comparing the data in the table with the data stored in the stream, we can easily identify table deltas, which are the differences between the current state of the table and a previous state. These table deltas can be used to track changes to the data over time, identify trends and patterns, and enable real-time analytics use cases.
Snowflake stream pricing
Streams does have some benefits from cost perspective.
- A stream will only fetch new data when there are changes to the source table
- Any logic will consume data only when there is data in the stream and not all the time
- Any logic that you implement afterwards will consume credits only when there is data in Stream and will not consume credits when there is none.
Lets see it in action;
-- Create a small table. called source table from here onwards
create or replace table users (
id int,
first_name varchar(200),
last_name varchar(200)
);

-- Create streams object against `users` table
create or replace stream users_cdc_stream on table users;

-- Check if we have any deltas captures. Initially this will return `False`
SELECT SYSTEM$STREAM_HAS_DATA('users_cdc_stream');

-- insert rows into `users` table
insert into users (id,first_name,last_name)
values
(1,'Alice','Bob'),
(2,'Carol','Chuck'),
(3,'Craig','Dan');

-- Check for deltas again. This time, we should get `True`
SELECT SYSTEM$STREAM_HAS_DATA('users_cdc_stream');

-- Query stream object like a usual table
select * from users_cdc_stream;
Execute above lines into your snowflake console one-by-one by reading through comments on each. You noticed in line 22 SYSTEM$STREAM_HAS_DATA returns True after we did the INSERT on source table. The resulting data in stream object are new inserted rows.
 The above return table is the result of last query
 select * from users_cdc_stream;. You will observe that the stream object contains same columns as source table + additional three columns;
* METADATA$ACTION: Indicates the type of change that was made to the row in the table. Possible values include “INSERT”, “UPDATE”, “DELETE”, and “TRUNCATE”.
* METADATA$ISUPDATE: A Boolean value that indicates whether the row represents an update to an existing row in the table.
* METADATA$ROW_ID: A unique identifier for each row in the stream. This identifier can be used to correlate changes in the stream with the corresponding rows in the table.
At this point, we are ready to offload these deltas into s3 bucket. Execute following command in snowflake console;
COPY INTO @S3_STORAGE_STAGE/users.json
 FROM (SELECT OBJECT_CONSTRUCT('id', id, 'first_name', first_name, 'last_name', last_name) FROM users_cdc_stream)
 FILE_FORMAT = (TYPE = JSON COMPRESSION = NONE)
SINGLE=TRUE
OVERWRITE=TRUE;
Three things has happened after executing the above COPY INTO command;
Stream offset updated:
The SELECT SYSTEM$STREAM_HAS_DATA('users_cdc_stream'); will now return False. Which means stream has nothing new to report after we consumed recent captured deltas. Streams achieve this by using a pointer called offset. Offsets are used to keep track of the position of the last consumed record in a stream. When using the COPY INTO command to consume records from a stream, Snowflake automatically advances the offset to the end of the consumed records. This ensures that we don’t re-consume the same records in the stream multiple times.
NOTE: It’s worth noting that Snowflake streams are designed to capture all changes to a table in real-time, so you can always be confident that you’re working with the most up-to-date data. And because Snowflake handles all the heavy lifting of managing offsets and maintaining the stream, you can focus on building your data pipeline and performing real-time analytics.
File landed in s3 bucket:
We executed COPY INTO at stage @S3_STORAGE_STAGE as our destination locations. This should create and upload a json file into our s3 bucket.


Deltas sent to Kafka topic:
Our s3 source kafka connector was waiting for .json files to be landed in s3. Now that the file is there, lets check if above deltas are sent into kafka topic. Head over to kafka web ui http://127.0.0.1:3030 > Topics;

You’ll see a new topic s3-kafka-etl will automagically be created for us, with three records representing each delta rows. Now lets insert another row into the source table and see if it sent to kafka topic too;
insert into users (id,first_name,last_name)
values (4,'John','Blaze');

COPY INTO @S3_STORAGE_STAGE/users_new.json
FROM (SELECT OBJECT_CONSTRUCT('id', id, 'first_name', first_name, 'last_name', last_name) FROM users_cdc_stream)
FILE_FORMAT = (TYPE = JSON COMPRESSION = NONE)
SINGLE=TRUE
OVERWRITE=TRUE;

Its worth noting here that we have changed the destination s3 file name to be different. This is important because s3 source kafka connector does not picks up the files already processed. So in production, you do want to add a unique UUID with the file names ever time you offload deltas.
Conclusion
In this Snowflake to kafka tutorial, we learned how to capture table deltas and offload into s3 bucket using Snowflake’s built-in support for streams and COPY INTO command respectively. We then demonstrated how to setup a kafka s3 source connector to read new files landing in s3 and load them to kafka topic. Please keep in mind that this is not an event-driven real-time solution, as kafka streams are query based CDC (and not log based CDC). Which means we have to query the stream object every time to check for deltas. This process can be productionized by wrapping the snowflake scripts inside a stored procedure and ran on scheduled bases using snowflake tasks.
Another thing to keep in mind is that s3 source kafka connector also operates on polling mechanism. It scans s3 bucket desired location to check for new files, at a fixed interval. Frequent polling on a big s3 bucket will cost you more on read operations. So keep the polling interval at a reasonable rate.
Read more learning tutorials;